

Overview
The Excel to SharePoint List Importer is designed to simplify importing data from Excel (.xlsx) and CSV (.csv) files into SharePoint Lists. It eliminates the need for manual list creation, column mapping, and row-by-row copy-pasting.
With this tool, users can:
- Create new SharePoint lists (with automatically generated list columns based on Excel headers).
- Upload data into existing SharePoint lists.
- View upload progress, errors, and history through a dashboard.
1. Solution Installation and Deployment
Upload Solution to the App Catalog
- Navigate to your SharePoint Admin Center.
- Go to Apps > App Catalog.
- Upload the .sppkg package file (for example, ExcelToSPListImporter.sppkg) to the Apps for SharePoint section.
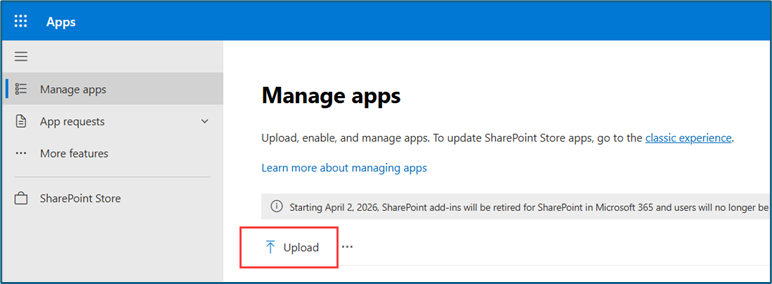
- Choose whether to deploy the app to a single site or all SharePoint sites.
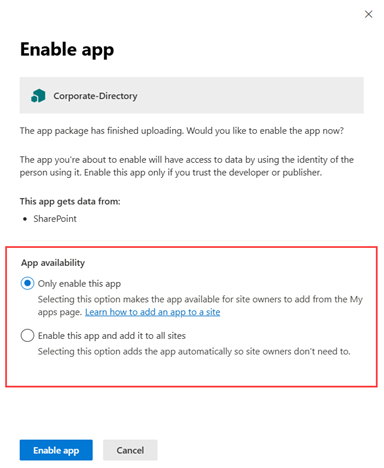
- Click the Enable App button after upload.
2. Adding the Web Part to a SharePoint Site
Add the App to the Site
- Navigate to the SharePoint site where you want to use the web part.
- Go to Site Contents > + New > App.
- Select the Excel to SharePoint List Importer app from My Apps and add it to your site.
Edit the Page and Add the Web Part
- Open the SharePoint page where you want to display the web part.
- Click Edit Page.
- In the web part toolbox, search for Excel to SharePoint List Importer and add it to the page.
- Once added, the Excel to SharePoint List Importer home page will appear.
3. Web Part Configuration
When you open the home page, you’ll see two options:
“Import Data” and “Dashboard.”
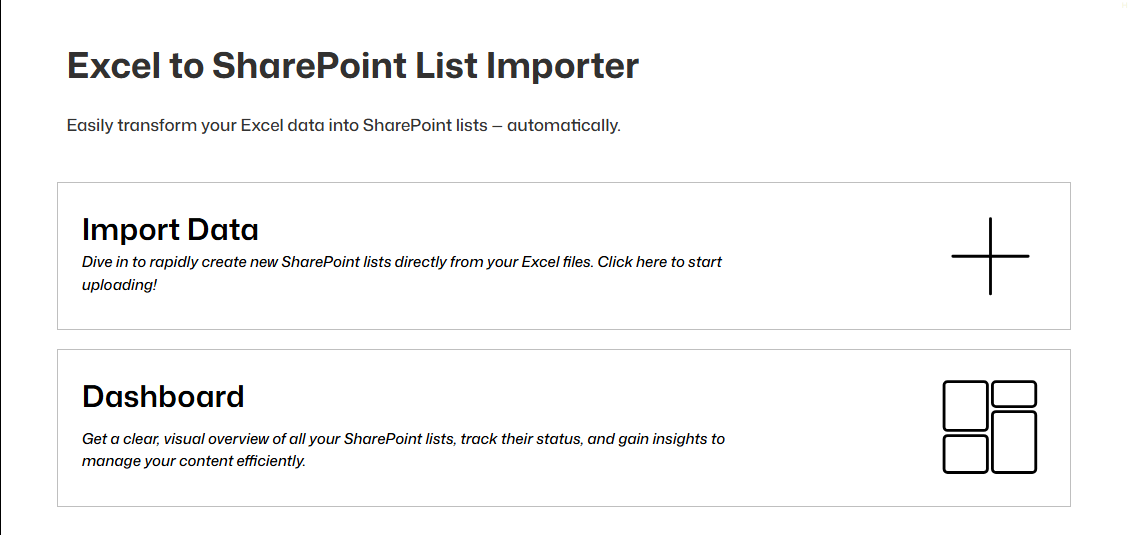
Import Data Page
On the Import Data page, two options are displayed: “New List” and “Existing List.”
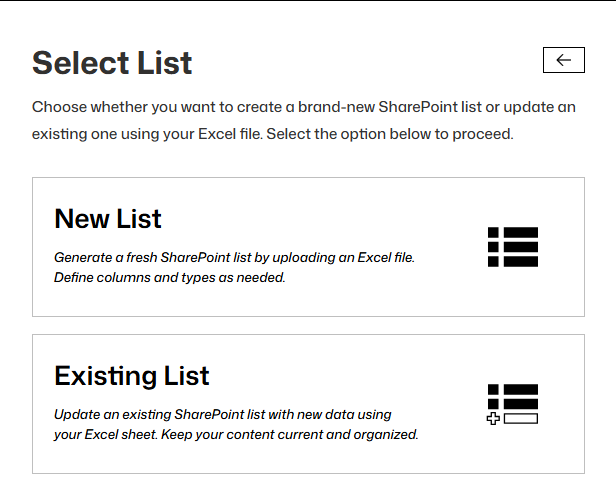
New List Page
- Generate a new SharePoint List by uploading an Excel or CSV file.
- The system automatically detects and displays column names and their corresponding data types.

- A preview of sample data from each column is shown for verification.
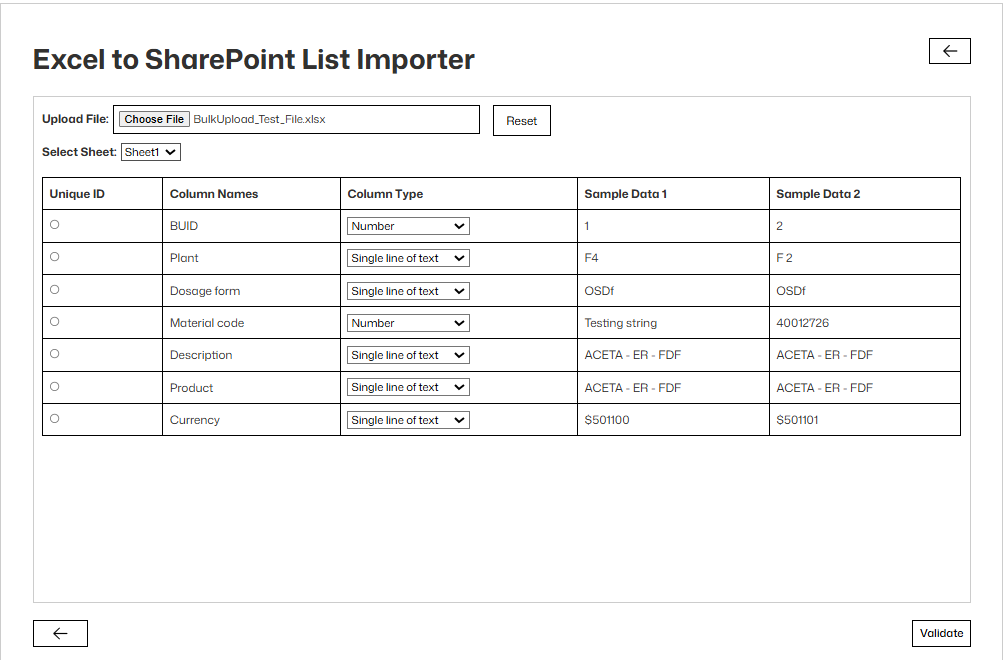
- You can manually adjust column types if needed.
- Select one column to act as the Unique ID column (used to identify and prevent duplicates).
- Validate the data; if validation succeeds, proceed to create the list. If any data is invalid, an error popup will appear.
- Enter a List Name for the new SharePoint List.
Existing List Page
- Use this option to update or add new records to an already existing SharePoint List.
- The uploaded file must have the same column names as the target SharePoint list.
- If column names do not match, an error message will appear prompting correction.

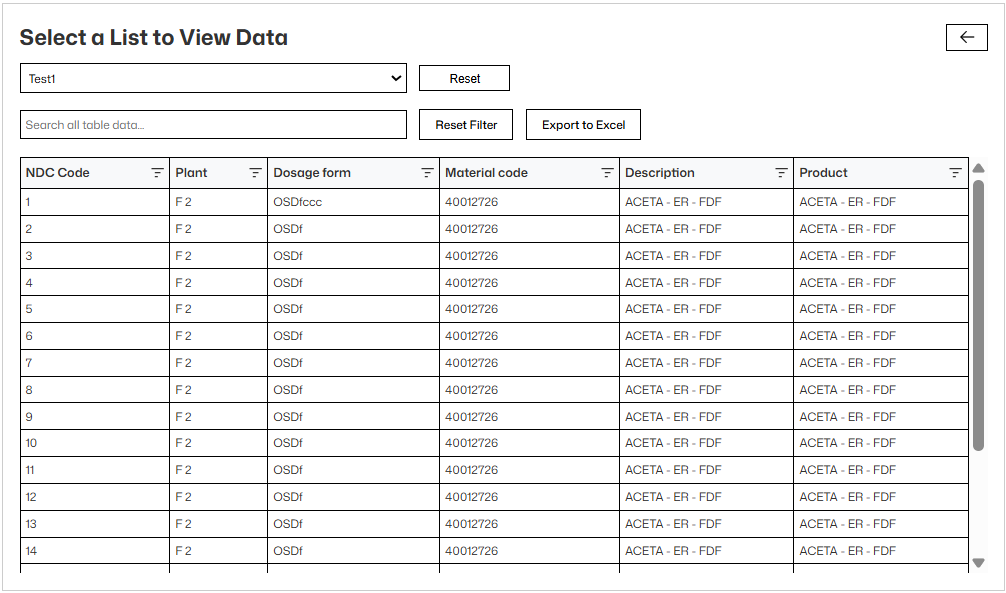
Dashboard Page
- View all imported or updated data via the Dashboard.
- Select any SharePoint List from the dropdown to view its contents.
- Filter and search data by column or date.
- Export the displayed data to Excel for offline use.
- The dashboard also shows the import history and any errors encountered during uploads.
4. Troubleshooting Tips
Error: “Invalid Column Name”
Ensure that the uploaded Excel or CSV file has the same column headers as the target SharePoint list. Rename headers in your source file if needed.
Error Popup on Validation
Verify that each column’s data type matches the corresponding SharePoint column type. Correct mismatches before re-uploading.
Data Not Appearing in Dashboard
Refresh the page or clear browser cache. Ensure the correct list is selected in the Dashboard dropdown.
App Not Visible in Site Contents
Confirm that the .sppkg solution was deployed to the App Catalog and that you have the necessary permissions to add apps.
5. Key Notes
- The Unique ID column is mandatory to prevent duplicate or conflicting records.
- Uploaded Excel/CSV files must have:
- Headers in the first row
- Clean data (no merged cells)
- Properly formatted values matching SharePoint column data types
- Exported Excel files from the Dashboard retain applied filters for easier offline analysis.